Pre-requisite tasks
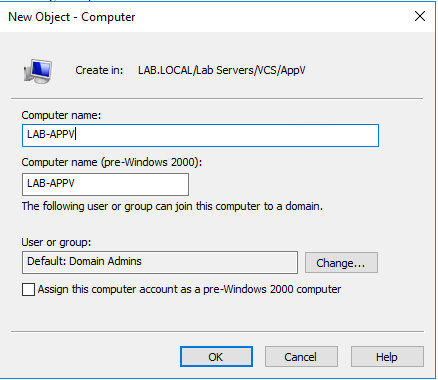
Step 1: Launch Active Directory User & Computers, Create a new Computer account in the Correct OU (in my case LAB\Lab Servers\VCS\Appv
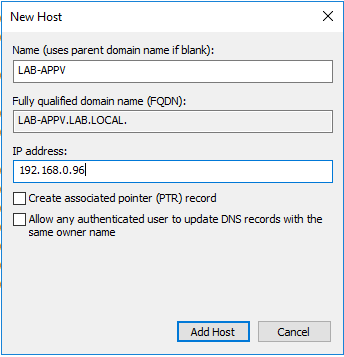
Step 2: Launch DNS Server Name > Forward Lookup Zone > LAB.LOCAL. Enter the below information and click Add Host
- Name: LAB-APPV
- IP Address: 192.168.0.96 (this will be a VIP Address created later in the article)
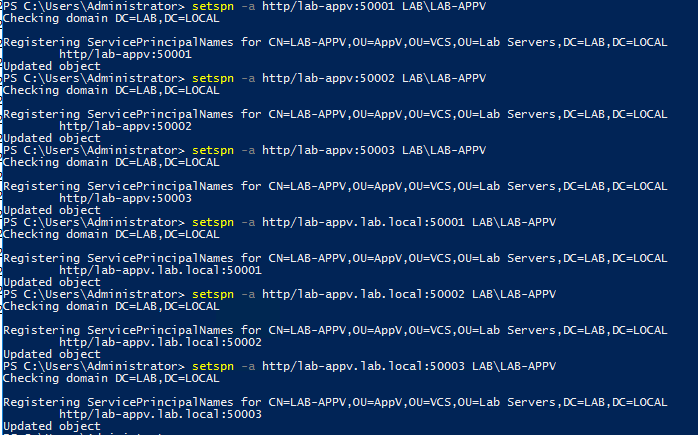
Step 3: Run the following in Powershell (run as administrator) command to enable Kerberos for the LB Computer Account.
setspn -a http/lab-appv:50001 LAB\LAB-APPV
setspn -a http/lab-appv:50002 LAB\LAB-APPV
setspn -a http/lab-appv:50003 LAB\LAB-APPV
setspn -a http/lab-appv.lab.local:50001 LAB\LAB-APPV
setspn -a http/lab-appv.lab.local:50002 LAB\LAB-APPV
setspn -a http/lab-appv.lab.local:50003 LAB\LAB-APPV
Add Load Balance Configuration
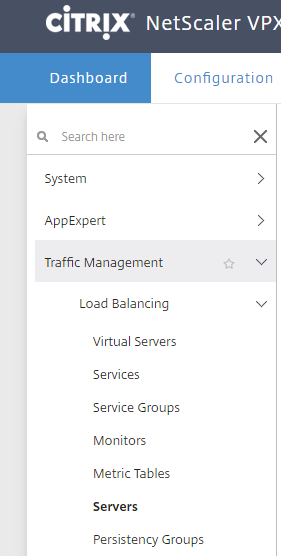
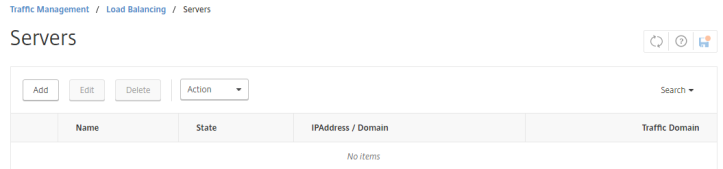
Step 1: Browse to Traffic Management > Load Balancing > Servers
Step 2: At Server, Click Add
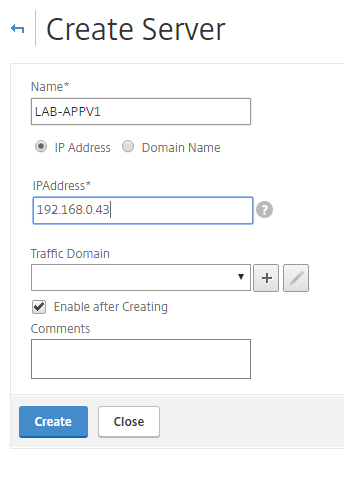
Step 3: Enter Name and IP Address below, then click create
- Name: LAB-APV1
- IP Address: 192.168.0.43
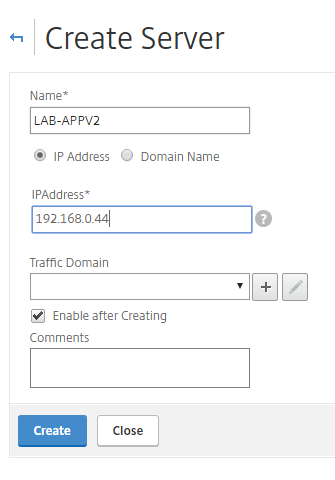
Step 4: Click Add again under Server, Enter Name and IP Address below, then click create
- Name: LAB-APPV2
- IP Address: 192.168.0.44
Step 5: The two server will now be add to server page.

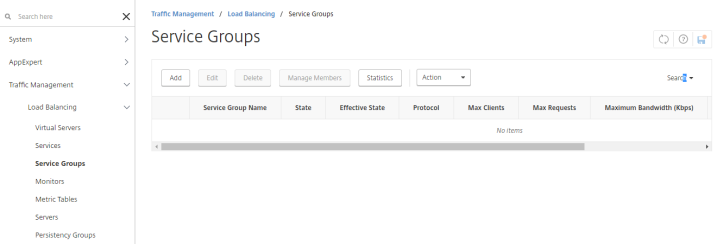
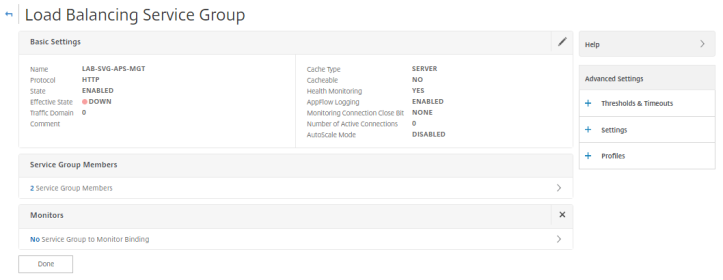
Step 9: Browse to Traffic Management > Load Balancing > Service Groups
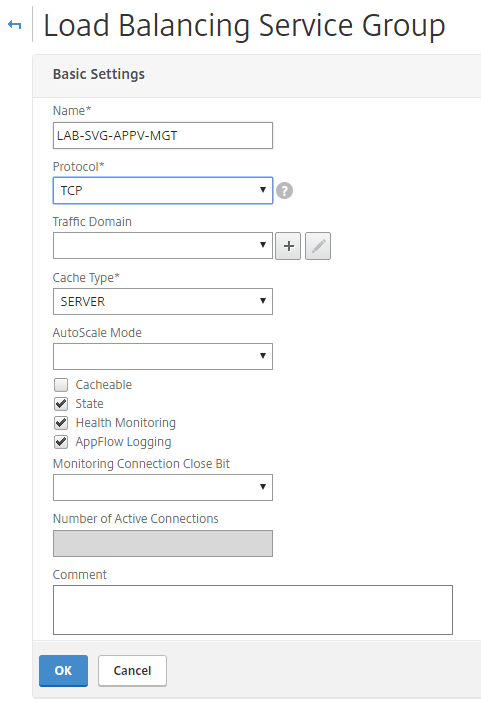
Step 10: Add the following info on basic setting, click OK
- Name: LAB-SVG-APPV-MGT
- Protocol: TCP
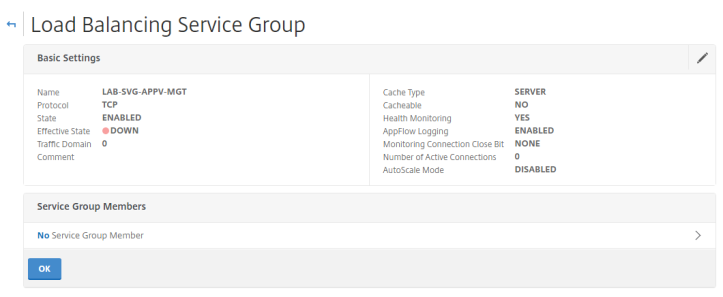
Step 11: Click No Service Group Members under services and groups section
Step 12: Choose Server Based, then Click to Select
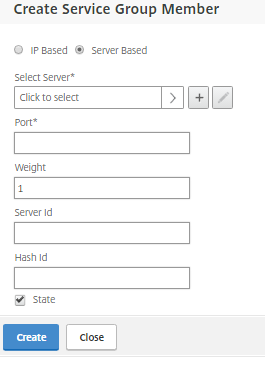
Step 13: Under Select Server Choose LAB-APPV1 , Add Port 50001 , click create and then repeat step 9/10 for LAB-APPV2


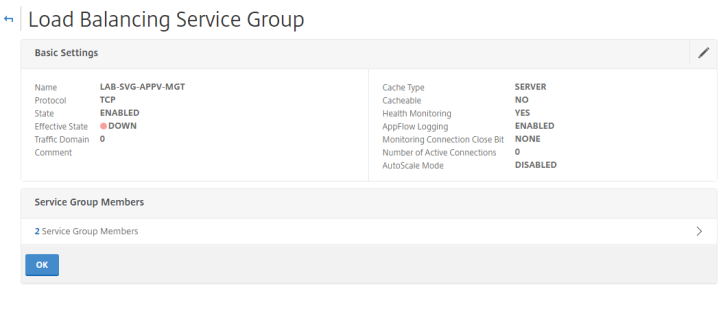
Step 14: Click OK at Load Balancing Service Group Main Page to create Service Group.
Step 15: Select Monitors from Advanced Setting, Click No Service Group to Monitor Bindings
Step 16:
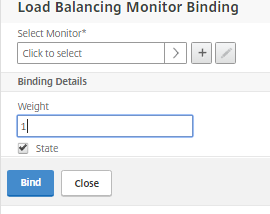
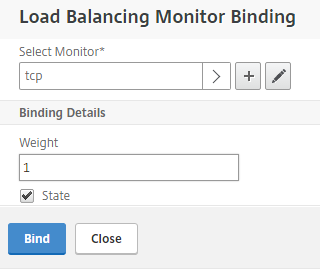
Step 17: Select TCP Monitor, Click Select

Step 18: Select Bind with weight left at 1
Step 21: Click Done to complete service group
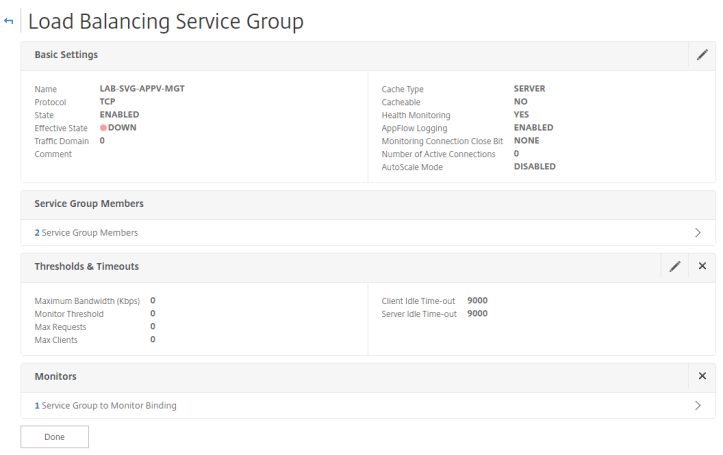
Step 22: Repeat Step 9-14 with the additional appv ports for administrators:
Service Group:-
- Name: LAB-SVG-APPV-PUB
- Protocol: TCP
- Port: 50002
- Server Members : LAB-APPV1, LAB-APPV2
- Monitor : TCP
- No Threshold
- Name: LAB-SVG-APPV-REP
- Protocol: TCP
- Port: 50003
- Server Members : LAB-APPV1, LAB-APPV2
- Monitor : TCP
- No Threshold

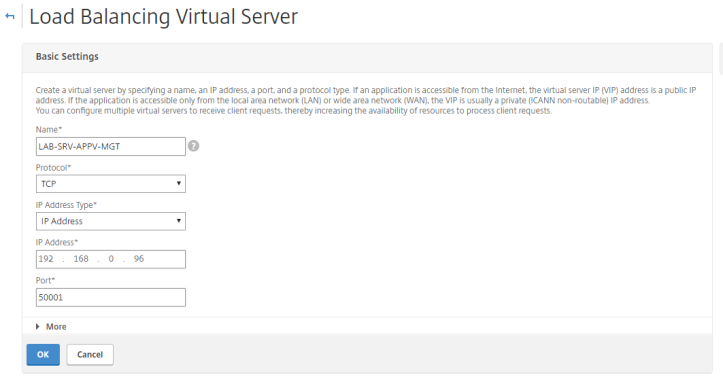
Step 24: Browse to Traffic Management\Load Balancing\Virtual Server, Click Add
Step 25: Enter the following information. Click Ok
- Name: LAB-VSRV-APPV-MGT
- Protocol: TCP
- IP Address: 192.168.0.96
- Port: 50001
Step 26: Select No Load Balancing Virtual Server ServiceGroup
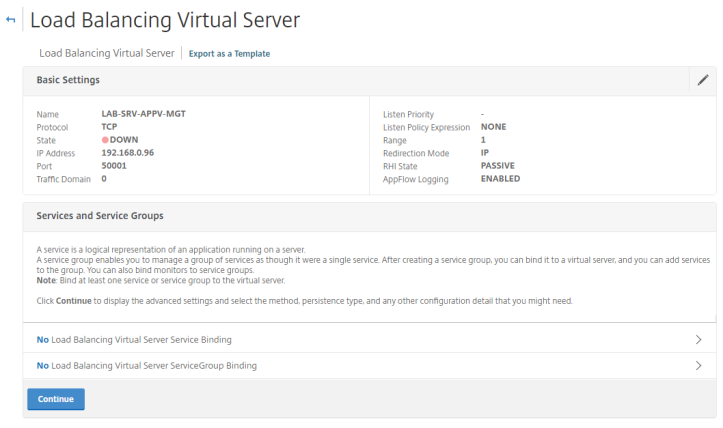
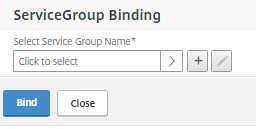
Step 27: Under ServiceGroup Binding, Click to Select
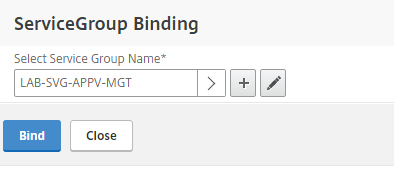
Step 28: Select LAB-SVG-APPV-MGT and Click Select

Step 29: Click Bind
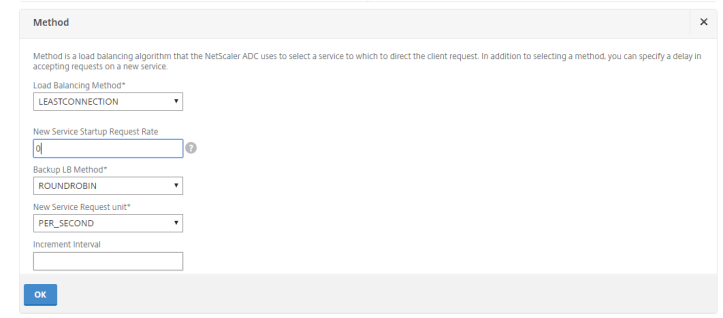
Step 30: Click Continue,then select Method from Advanced Setting
Step 31: Set the following information, then click OK, Then click Done
- Load Balancing Method: Least Connection
- Backup LB: Round Robin
Step 32: Repeat Step 24-31
AppV Publishing Service
VServer & Service Group
- Name: LAB-VSRV-APPV-PUB
- Protocol: TCP
- IP Address: 192.168.0.96
- Port: 50002
- Service Group: LAB-SVG-APPV-MGT
Persistence
- None required, leave Least Connection for Method
AppV Reporting Service
VServer & Service Group
- Name: LAB-VSRV-APPV-REP
- Protocol: TCP
- IP Address: 192.168.0.96
- Port: 50003
- Service Group: LAB-SVG-APPV-REP
Persistence
- None required, leave Least Connection for Method
Step 53: Confirm all 3 Virtual Servers appear Up.

Test & confirm Load Balance
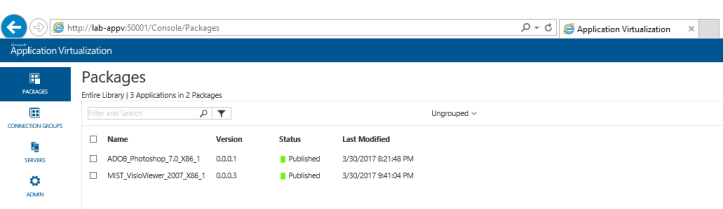
Step 1: Access the AppV Management http://lab-appv:50001
Step 2: Confirm the AppV Management Console loads and packages are shown.
Step 3: Access the AppV Management http://lab-appv:50002 with a user that had packages assigned (in my case LAB\ctxuser1
Step 4: Confirm on accessing the webpage that the packages that are assigned are listed on the <Packages> </Packages>

Step 5: Access the AppV Management http://lab-appv:50003 with a user that had packages assigned (in my case LAB\ctxuser1
Step 6: Confirm on accessing the webpage the below screen appears. The method not allowed is ok as it is expecting other information in the request.


Hi David.
thank you for your article. It works fine.
When we change to ssl, bind the certificate to the virtual server, to the iis on the app-v Server, create the dns record, it doesn´t work. Can you recommend us the best practise to use ssl for this szenario?
Thank you in advance
Gérard
LikeLike
Hi Gerard,
Are you binding the certificate to the three separate websites? To do this you’ll need to re-configure each existing website to another port , then r-bind to select https, existing port configured during installation and then selecting the certificate. Repeat then for each of the website and then remove the http binding.
Nothing on the load balancing configuration needs to be change.
i’ll publish an article on how this is done if that helps.
LikeLike
i have complete a article to cover enabling SSL communication in AppV – https://wilkyit.com/2017/04/27/appv-5-1-configuring-ssl-for-appv-managementpublishing-and-reporting-services/
Hope this helps and resolves your issue
LikeLike
[…] is a follow on my previous post – Installing Microsoft App-V 5.1 on Windows Server 2016 and Load Balance AppV 5.1 using Netscaler 11.x/12.x on how to secure the communication within App-V by using SSL instead of the default […]
LikeLike